
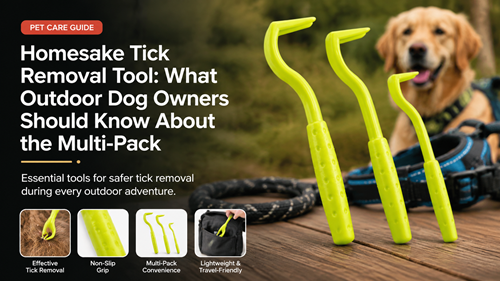
Homesake Tick Removal Tool is most useful when an outdoor-dog owner treats the multi-pack as an access system rather than as several identical pieces stored in one drawer. One remover can live near the home grooming area, another can stay in a walking or hiking bag, and a spare can remain in the car or travel kit.
The tool does not prevent ticks from attaching. Prevention still includes veterinarian-recommended tick control, avoiding heavy tick habitat when possible, and checking the dog after outdoor exposure. The remover becomes important after a tick is found and the owner needs a clean mechanical tool immediately.
A practical multi-pack therefore needs a plan for storage, cleaning, inspection, and replacement. The value is not the number of pieces in the package; it is whether a suitable remover can be reached quickly without searching through multiple bags or cabinets.
How Homesake Tick Removal Tool Fits Outdoor Dog Care
Outdoor dogs can encounter ticks in grass, brush, leaf litter, wooded edges, campsites, and even maintained yards. CDC recommends checking pets daily for ticks, especially after time outdoors, and removing attached ticks promptly.
A multi-pack can reduce delay because the owner does not need to move one tool between a home bathroom, trail bag, vehicle, and travel case. That convenience matters only if each location is maintained; a bent, dirty, or missing remover does not create preparedness.
This article complements the August 10-pack access-plan article by focusing on outdoor use: hiking, camping, trail-day checks, and the way a smaller multi-pack can be distributed across the places where a tick is most likely to be discovered.
What to Review in a Homesake Tick Removal Tool Multi-Pack
Match the Pack to Real Storage Locations
A multi-pack tick remover set makes sense when each piece has a job. Label the home, car, and trail kits so tools are returned to the same place after cleaning.
If every remover stays in the retail package, the multi-pack may not improve access. Open and distribute the tools only after reading the included directions and confirming how each size or shape is intended to be used.
Understand What Chemical-Free Means
A chemical-free tick tool removes a found tick mechanically. It does not repel ticks, kill ticks before attachment, or replace a preventive product recommended for the dog.
That distinction prevents a common planning error: treating removal preparedness as prevention. Keep both layers in the outdoor-dog routine.
Compare the Tool with Other Mechanical Options
A tick removal device for pets should give the owner a stable grip and a method that can be used without squeezing or digging aggressively into the skin. Different hooks, cards, spoons, and tweezers suit different tick sizes and locations.
Practice handling the clean tool before a real tick check so the owner knows how it is held and where fingers should be placed while keeping the dog steady.
Build a Trail-Day Kit Instead of Carrying One Loose Tool
The August guide on a dog hiking tick kit shows why access matters across several locations. For a trail bag, add a small light, gloves, hand sanitizer, waste or specimen container, and the veterinarian’s phone number.
Store the remover in a rigid or zippered pocket where it will not fall out with treats, waste bags, or water bottles. A tool buried loose at the bottom of a pack is difficult to use when a dog is restless.
Keep a Reusable Tool Clean and Intact
A reusable tick extractor should be checked after every use for cracks, bent edges, contamination, or damage that could affect grip. Follow the product cleaning instructions rather than using harsh chemicals that could degrade plastic or coatings.
Let the tool dry fully before it returns to a closed pouch. Replace damaged pieces instead of keeping them as emergency spares.
Connect Removal to Pet First Aid
A pet first-aid grooming tool is useful when the owner also knows where to check for ticks and what changes to monitor after known exposure. CDC highlights areas such as around the ears, eyelids, collar, legs, toes, and tail.
Record the date and likely exposure location after removing a tick. If the dog later develops changes in appetite, energy, gait, or behavior, that history can help the veterinarian.
Where Each Tool Can Live
A multi-pack becomes more valuable when each location has a complete mini-kit rather than one isolated remover.
| Location | Keep with the Remover | Maintenance Habit |
|---|---|---|
| Home grooming area | Light, gloves, comb | Clean after each use |
| Daily walking bag | Small light, waste bag | Check weekly |
| Car kit | Gloves, sealed container, contacts | Avoid heat damage and clutter |
| Hiking backpack | First-aid supplies, water, light | Inspect before every hike |
| Travel luggage | Vet information, spare pouch | Repack after each trip |
| Second caregiver kit | Written removal directions | Confirm tool returns after use |
Use the Multi-Pack as Part of Every Outdoor-Day Check
Check the dog before settling into the home after hiking or walking through tick habitat. Use both sight and fingertips because ticks can hide in dark or dense fur. Pay extra attention to the head, ears, collar line, armpits, groin, between toes, and around the tail.
If a tick is attached, keep the dog as calm and still as possible. Use the remover according to its instructions and veterinary guidance. Do not burn the tick, coat it with petroleum jelly, or apply another improvised substance in an attempt to force release.
After removal, clean the bite area and hands as appropriate, inspect the rest of the dog, and monitor the site. If the tick is in a difficult location or the dog cannot be handled safely, veterinary removal may be the better option.
Outdoor Tick Kit Checklist
- Dedicated tick remover
- Small flashlight or headlamp
- Disposable gloves
- Fine comb for coat checks
- Sealable container or bag
- Hand-cleaning supplies
- Veterinarian contact details
- Written tool instructions
- Spare remover in a second location
The most useful tool is the one the owner can reach and use correctly. Replace or relocate kit items whenever a hike shows that the current setup is slow, messy, or difficult to access.
Know When Home Tick Removal Is Not the Best Choice
Contact a veterinarian when a tick is attached near the eye or inside the ear, when the dog is painful or cannot be restrained safely, when the skin is already inflamed or infected-looking, or when part of the tick remains and the site is worsening.
Tickborne illness signs can appear days or weeks after exposure. Tell the veterinarian about known tick attachment if the dog develops unusual tiredness, appetite changes, lameness, fever, or behavior changes.
Turn the Multi-Pack into an Access System
Homesake Tick Removal Tool works best for outdoor dog owners when the pieces are distributed intentionally across home, car, trail, and travel locations. That arrangement reduces the chance that a tick is found while the only remover is somewhere else.
Keep prevention, daily checks, correct mechanical removal, clean storage, and veterinary follow-up together in the same plan. The tool solves an access problem; it does not replace the rest of tick protection.
Frequently Asked Questions
How many tick removers should an outdoor dog owner carry?
One clean remover in the active walking or hiking kit is usually enough for the outing, with spares stored in other useful locations.
Does a tick remover prevent ticks from biting?
No. It is a mechanical removal tool for a tick that has already been found. Use veterinarian-recommended prevention separately.
Should I twist or pull a tick remover?
Use the exact technique supplied with the specific tool. Different hooks and tweezers are designed to be handled differently.
How should a reusable tick tool be cleaned?
Follow the manufacturer’s cleaning instructions, allow the tool to dry, and inspect it for damage before returning it to storage.
When should a veterinarian remove the tick?
Seek veterinary help when the location is difficult, the dog cannot be safely restrained, the site looks infected, or removal is not going smoothly.
